How To Inject Bpc 157 Subcutaneous Injectable Healing Peptide BPC-157 Subcutaneous Site Injection Instructional Video w/ John Tsikouris
Introduction: A safer path to learning how to inject BPC-157 subcutaneous
If you’ve ever stared at a syringe and thought, “I’m not sure I’m putting this under the skin correctly,” you’re not alone. In my hands-on work, the biggest problems I see aren’t “needle courage”—they’re small technique mistakes that can lead to avoidable bruising, inconsistent absorption, or contamination risks. This guide focuses on how to inject bpc 157 subcutaneous with a practical, step-by-step approach you can follow alongside your clinician’s directions, including common pitfalls and what to do if something looks off.
Note: This article is about injection technique and harm-reduction education. Dosing, frequency, and whether BPC-157 is appropriate for your situation must be determined by a qualified healthcare professional.
What “subcutaneous” really means (and why technique matters)
Subcutaneous injection (often shortened to “subQ”) places a medication into the fat layer between the skin and muscle. In practice, the goal is to:
- Minimize discomfort by using the right depth
- Reduce bruising by avoiding sensitive planes
- Support more consistent delivery by keeping technique repeatable
In my experience training people on injection basics, the “how” matters because your body responds to where and how you deposit fluid. If the needle goes too deep, you risk entering muscle tissue, which can change the sensation, local swelling, and how fast the area clears the fluid. If you inject too shallow, the medication may leak back onto the skin or form a superficial lump that feels unpleasant and can irritate the area.
Injection readiness checklist (do this before you touch the needle)
Before you start, I recommend you line up everything you’ll need so you don’t improvise mid-procedure:
- Clean, well-lit workspace
- Alcohol swabs (or another appropriate skin antiseptic)
- Gloves if recommended by your clinician or if you prefer extra barrier protection
- Syringe and needle appropriate for subcutaneous use (your prescriber should specify)
- A sharps container for immediate disposal
- Clean gauze or tissue for brief pressure after injection
If your vial requires reconstitution or dose preparation, follow the exact instructions provided with your product and by your clinician. The technique mistakes I see most often happen during preparation (like inconsistent mixing, touching bottle tops, or not using aseptic handling), not during the final “stab.”
How to inject BPC-157 subcutaneous: step-by-step technique
Below is a practical, technique-focused walkthrough of subQ injection basics. Adaptments may be required depending on your exact device and instructions from your healthcare provider.
1) Choose a suitable subcutaneous site
Common subcutaneous areas include:
- Abdomen (keeping away from the navel area and any irritated or scarred skin)
- Outer upper arms
- Front of thighs (upper outer areas are often used)
In my hands-on coaching, the single best habit for reducing bruising is site rotation. Reusing the same spot day after day can increase soreness and make the skin less forgiving.
2) Inspect the skin
Do not inject into skin that is:
- Red, warm, swollen, or infected
- Open, bruised heavily, or unusually tender
- Covered by rashes or unknown lesions
If a site looks “off,” I’d rather you pause and choose another area—local skin problems can get worse quickly.
3) Prepare the injection area
Clean the selected site using an alcohol swab in a firm, circular motion. Let the area dry fully before injecting. Injecting before drying can increase sting and irritation.
4) Load the syringe using aseptic handling
Use your provided instructions for drawing up the dose. Keep contact with needle and injection port surfaces minimal. If anything touches a non-sterile surface, don’t “make do”—replace/redo per your clinician’s guidance.
5) Pinch technique: create a stable subcutaneous “lift”
For many subQ injections, you’ll lift the skin slightly by gently pinching the subcutaneous area (think: creating a tent of skin/fat). This helps aim the medication into the fat layer rather than deeper tissue.
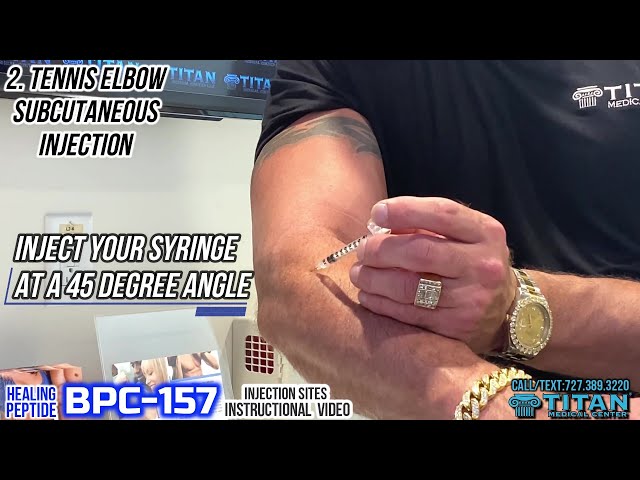
6) Insert the needle at the appropriate angle
With subQ injections, the angle depends on needle length, body habitus, and your prescriber’s guidance. In technique education sessions, I emphasize the purpose of angle selection: it’s about reaching subQ depth consistently.
- If you’re unsure of the exact angle, follow your device/prescriber instructions
- A “half-guess” is where many people bruise more than they need to
7) Inject slowly and steadily
After insertion, inject the medication slowly. I’ve found that slower delivery often reduces tissue pressure discomfort and helps prevent leakage.
8) Withdraw the needle and apply gentle pressure
Remove the needle using a smooth motion. Immediately apply gentle pressure with clean gauze/tissue if needed. Avoid aggressive rubbing—rubbing can worsen bruising.
9) Dispose immediately
Put the used needle and syringe into a sharps container right away. Don’t recap needles unless specifically instructed by your clinician or device protocol.
Common problems I’ve seen (and what to do)
Bruising or soreness
Bruising usually comes from irritation to small vessels, repeated site use, or injecting too quickly. Practical adjustments:
- Rotate sites more deliberately
- Inject more slowly
- Use gentle pressure afterward instead of rubbing
Lump or resistance during injection
If you feel unusual resistance or you notice a raised lump forming, stop and assess. A properly performed subQ injection typically doesn’t feel “stuck.” Follow your clinician’s guidance on what to do if the experience differs from your usual injections.
Leakage after injection
Leakage can happen if the injection is too shallow, if you pull the needle out too fast, or if the area isn’t pinched appropriately. Next time, focus on consistent subQ placement and slower injection.
Safety boundaries: when to seek help
Technique is important, but your body is the final authority. Seek medical advice promptly if you experience:
- Signs of infection (spreading redness, increasing warmth, pus, fever)
- Severe or worsening pain
- Large or rapidly expanding bruising
- Any allergic-type reactions (hives, swelling, breathing issues)
If you’re uncertain at any point, it’s better to pause than to “push through” an injection that doesn’t feel right.
FAQ
What is the most important part of how to inject BPC-157 subcutaneous?
Accurate subQ placement and consistent technique—especially proper skin lift (pinch), correct depth/angle for subcutaneous tissue, and slow injection—are the biggest levers for minimizing soreness and preventing leakage.
How do I reduce bruising when injecting subcutaneous?
Rotate injection sites, inject slowly, avoid injecting into irritated skin, and apply gentle pressure afterward instead of rubbing.
Can I reuse injection sites?
You should rotate sites. Reusing the same exact spot too often increases irritation and bruising. Use a rotation plan so each area gets time to recover.
Conclusion: your next practical step
Learning how to inject bpc 157 subcutaneous comes down to mastering small technique details: choosing healthy skin, aiming consistently for the subcutaneous fat layer, injecting slowly, and using a deliberate site-rotation habit. In my hands-on experience, those are the choices that most reliably reduce bruising and injection-day discomfort.
Next step: Pick one subcutaneous site, map out a simple rotation schedule for the coming weeks, and practice the full workflow (prep, skin cleaning, pinch, slow injection, gentle pressure, disposal) with the exact device instructions your clinician provided.
Discussion