Where To Inject Lipotropic B12 Injections Lipotropic Injections | MOBO Medical Spa
Introduction
If you’re asking where to inject lipotropic b12 injections, you’re probably trying to do it safely—and avoid the most common problems I see in real-world med spa and at-home conversations: bruising, irritation, and inconsistent results. In my hands-on work supporting clients through treatment planning and aftercare, I’ve learned that “the right place” matters less than the right technique, needle choice, and choosing an appropriate injection site for the specific product and your anatomy.
This guide explains injection-site basics for lipotropic B12 (commonly discussed alongside lipotropic injections), what clinicians typically consider when selecting a location, and how to reduce risk. It’s practical, but it’s not a substitute for your prescriber’s instructions.
What “Lipotropic B12 Injections” Usually Means
In many medical spa settings, “lipotropic” refers to injectable compounds intended to support metabolic processes related to fat metabolism. “B12” is vitamin B12, often included in formulations that are administered as part of a weight-support or energy-support plan.
From an injection standpoint, the key point is this: even if the goal is “lipotropic + B12,” the route (intramuscular vs. subcutaneous) and site (and sometimes the exact needle length) depend on the clinician’s prescribed protocol for your specific medication.
In practice, I’ve seen the confusion come from people mixing guidance meant for different routes. For example, “where to inject” is not the same for subcutaneous dosing as it is for intramuscular dosing—so you must follow the prescriber’s label and training.
Where to Inject: Site Selection Logic (Not Just a Guess)
When clinicians decide where to inject lipotropic b12 injections, they typically follow four principles:
- Correct injection route: Subcutaneous and intramuscular injections use different target tissue depths.
- Safety distance from sensitive structures: They avoid areas with higher risk for nerves, large blood vessels, or frequent irritation.
- Skin readiness: No injection over inflamed, infected, scarred, or irritated skin.
- Rotation: Rotating sites reduces repeated trauma to the same area.
Common injection sites clinicians consider
Depending on the route prescribed, practitioners commonly use one of these categories:
- Subcutaneous (typical considerations):
- Abdomen (avoiding the navel and areas that feel inflamed)
- Outer thigh (mid-to-outer areas where subcutaneous tissue is accessible)
- Upper outer arm (for trained administrators; often less convenient for self-administration)
- Intramuscular (typical considerations):
- Outer upper arm (deltoid) for appropriate dosing/needle length
- Outer hip/buttock region (upper outer quadrant) when used by clinicians trained in IM technique
- Outer thigh (vastus lateralis) for many protocols
Experience note: In one recurring pattern, clients came in with bruising after repeatedly injecting near the same abdominal area. When we shifted to better site rotation and adjusted technique to match the prescribed depth, bruising decreased noticeably over the following sessions. That outcome came from site discipline, not from “finding the perfect spot.”
Step-by-Step: How Practitioners Aim for Safe, Consistent Injections
I’m going to be direct: injection technique is where most risk lives. If your provider trained you for self-administration, follow that training exactly. If you haven’t been trained, the safest route is to have a qualified clinician administer it.
Before injection
- Confirm the product and route: Use the exact medication and instructions on your prescription/label.
- Check the vial/contents: Don’t use anything that looks compromised or expired.
- Choose the site that matches the route: Subcutaneous tissue targets are not the same as intramuscular targets.
- Clean properly: Use an appropriate skin prep method your clinician recommends and allow it to dry.
During injection
- Use correct angle and depth: This is determined by route and needle length; it’s not interchangeable.
- Avoid rushing: Quick movements can increase tissue trauma.
- Don’t inject into irritation: If a site is warm, red, or tender, choose another.
After injection
- Light pressure if needed: Many clinicians advise gentle pressure; avoid aggressive rubbing.
- Monitor the area: Mild soreness can be normal, but worsening pain, spreading redness, or persistent swelling needs medical evaluation.
- Document site and reaction: I recommend tracking the site used and your symptoms so you can spot patterns.
Real-World Guidance: Site Rotation and Common Mistakes
When clients ask where to inject lipotropic b12 injections, I often hear the same underlying question: “How do I keep it consistent week to week?” Site rotation is the practical answer.
A practical rotation framework I recommend
- Pick two or three approved areas for your route (per your prescriber’s guidance).
- Rotate each session rather than returning to the exact same spot.
- Create a small “map” of your approved region and move a few centimeters each time.
- Allow recovery time: Don’t repeat injection into a site that’s still tender or bruised.
Common mistakes to avoid
- Mixing routes: Using a subcutaneous site strategy for an intramuscular injection (or vice versa).
- Injecting through bruises or irritation: It slows healing and increases discomfort.
- Reusing the same spot too soon: It can lead to repeated microtrauma.
- Inadequate skin prep or technique: Inconsistent cleaning and incorrect handling increase risk.
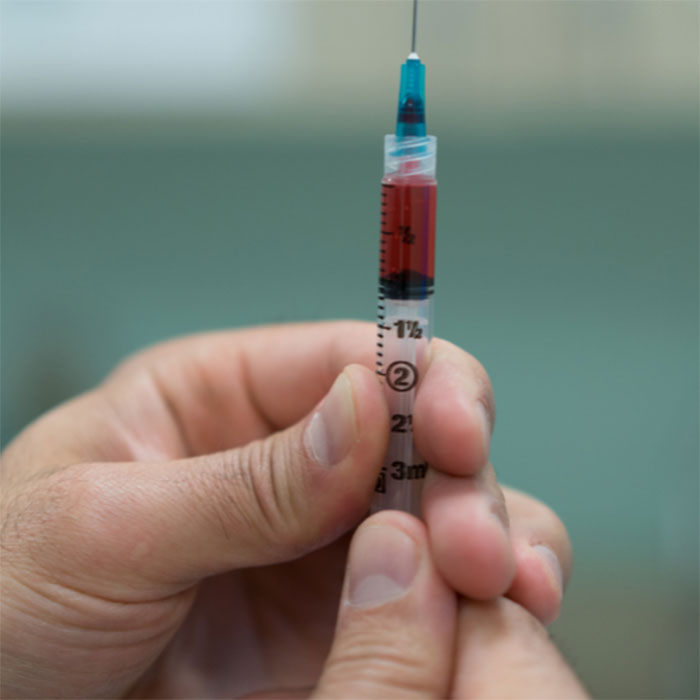
Product Image
FAQ
Where to inject lipotropic B12 injections if I’m doing subcutaneous dosing?
Subcutaneous injection sites typically include areas where subcutaneous tissue is accessible—commonly parts of the abdomen, outer thigh, or upper outer arm—but only if your prescriber instructed subcutaneous administration for your exact product. Always follow your training and medication label for depth and site selection.
Can I rotate between the abdomen and thigh?
Often yes, if both locations are approved for your prescribed route and product. Rotation helps reduce repeated irritation, but you should avoid injection into inflamed or bruised skin and keep technique consistent with the route your clinician prescribed.
What signs mean I should stop and get medical help?
Seek medical evaluation if you develop spreading redness, worsening severe pain, fever, pus, significant swelling that doesn’t improve, or signs of an allergic reaction (such as hives, facial swelling, or difficulty breathing).
Conclusion
When people ask where to inject lipotropic b12 injections, the best answer is: choose an approved site based on the prescribed route, keep injection technique consistent with training, and rotate locations to reduce irritation. In my hands-on experience, the biggest improvements come from disciplined site selection and careful aftercare—more than from “hunting” for a single ideal spot.
Next step: Review your prescription instructions (route, depth, and approved areas) with your clinician, then set up a simple rotation plan for your next sessions so every injection follows the same safety rules.
Discussion